CQA Interview: Renee

Renee after her curly conversion.

Renee after her curly conversion.

Renee is a friend and was the perfect candidate for curl conversion. A couple of years after following this blog’s suggestions, her hair is looking more gorgeous than even I could have predicted. Let’s hear how she did it!

Curly Q&A: Before you became a dedicated curly girl, what was your hair care routine?

Renee: I would use Tresemmé shampoo and conditioner, a second conditioner of Nexxus and then would use Biolagé as a leave in. Once out of the shower, I would use a detangler with a Sexy Healthy Hair cream to style, and top with hairspray.

CQA: Sounds crunchy! What made you decide to ditch the ‘poo (traditional shampoo)?

R: My hair was starting to get frizzier, impossible to comb, and I had to brush it. I started talking to other curly heads about it.

CQA: How long did it take to feel comfortable shampoo-free?

R: Probably a couple weeks to a month, I didn’t have the itchiness issues but it was just getting out of the old routine.

CQA: If you didn’t have itchiness, your scalp was probably screaming to be left alone and it sounds like you were finally hearing its cries. What is your hair care and styling routine now?

Renee before her curly conversion!

Renee before her curly conversion!

R: I wash it with Deva Curl No Poo once a week if that, and rotate days with using Aussie Moist conditioner and MoroccanOil conditioner. Other days I follow with Biolagé as a leave-in. If the weather is humid, I will use DevaCurl Angel light defining gel in the shower to finish. To style it, I use a mixture of Devacurl styling cream and Redken Curvaceous Ringlet and add Moroccan Oil curl styling cream if it’s humid out. Once a week I will also use a Moroccan oil conditioning treatment.

CQA: Sounds like you’ve really found a formula that works for your hair! It takes a village. What are some of the biggest differences that you’ve noticed in your hair health and appearance?

R: My hair isn’t as hard to finger comb, it’s softer and lasts longer between cuts. The curls are also much healthier.

CQA: Has it affected other parts of your life at all?

R: It’s made my hair routine so much easier and shorter.

CQA: Was there ever a time in your life when someone made your curls seem unprofessional or inappropriate in a situation?

R: I’ve had a lot of people constantly ask me if this is my natural hair and it made me feel uncomfortable when they’d respond with, “because most white women do not have as curly hair as you do.”

CQA: I just love when people feel totally comfortable remarking on women’s physical appearances in such ignorant and nonsensical ways. Is there anything else you’d like to share with would-be curly converts?

R: If you must straighten your hair, be sure to use a heat protector first as that was one of my biggest mistakes around my wedding; it damaged my hair and took months to get the curls back to normal.

CQA: Thanks so much Renee! You truly are a story of success and I so appreciate your taking the time to tell us about your journey!

Round or Flat? The Age Old Question Rages On

scissors_hairI have mentioned the importance of a proper hair cut on a curly head many times, but I don’t think that the subject can ever be given enough justice. There have been times that I’ve looked like a worn out hag or a wet rat because of my hair, and times that I’ve resembled a movie star strutting down the red carpet of my overactive imagination (major creative liberties being taken here, but you get the jist). Make-up and general face-issues not-withstanding, hair can really make or break a look. It’s based on the curl pattern and frizz factor of the day, but mainly, it’s the cut.

Until now, I have faithfully returned to my beloved Devachan Salon in Soho, NYC. They just get it. They cut curls dry without question, and use my favorite conditioners and gels. For years I’ve tried to cultivate this sort of “Mick Jagger” curly/wavy shag that fits my face shape, and sometimes it’s great, but it grows out really quickly and needs more maintenance than I can afford. Plus, I like the shag because it feels carefree and fun, and you can’t be those things when you’re always worried about your hair.

I have the types of curls that can be really glorious and well-defined, but also tend to either frizz or lie flat. I hate flat. Frizz I can work with, since you can use good hair oils and lots of conditioner and the right gel to keep it in check. But flat, blah!

I saw a great curly hair cut on a woman at the gym, and it was short and super layered. Think Meg Ryan in City of Angels. I had to ask her who does her hair, and it was a woman named Amy at Arté Salon, also in Soho. I was displeased with my last cut from Devachan, where one of the stylists I used to love seemed to rush me and not really listen to what I was saying. They also charge a s&^%load, as anyone who’s been there will know. I decided to go to Amy for my first consultation ever, since it was free and why not. I am in the tricky stage between wanting a hair cut I can love on the daily, but that isn’t too short or sparse to be used in a romantic ‘do for my wedding this August.

Course, thick curls cut in the traditional accordion style.

Course, thick curls cut in the traditional accordion style.

I loved Amy at first sight! She was so perky and knew exactly what I was talking about. She truly listened, and even more, she explained something that I hadn’t understood before. She has gone to many curly hair cutting classes, and the traditional way to cut curly hair has been to cut curls in a pattern that falls down your head in an accordion style, meaning that each strand is slightly shorter than the ones just below it. The reason for this is that it allows curls to fall on top of each other in a less upward-direction, diminishing the dreaded triangle, but also squelching voluminous roundness. Since curls have only recently become socially acceptable (hissss), there isn’t as much request for afro styles in the majority demographic. But take my word, they’re a-comin,’ and they’re fantastic.

Curls scooped out from underneath, with the shortest layers toward the bottom. This can be done with longer hair cuts, too.

Curls scooped out from underneath, with the shortest layers toward the bottom. This can be done with longer hair cuts, too.

This accordion cutting style works perfectly for people with thick or course textures, since they have enough hair to support some serious shape. But for ladies like me who don’t have as much thick beautiful hair, and top layers that tend to be more wavy than curly when long, Amy says that you have to do the exact opposite. You want to cut hair as if you’re scooping it out from underneath, so that each hair is slightly longer than the ones below it. That way the shorter strands underneath are pushing the top layers up. She even showed me how to do it myself between cuts so that I’m not constantly coming back for a re-shaping. It’ll take some practice, but when I have it figured out I will post a video.

The moral of the story: If you’re not happy with your hair, you deserve to be for all that money you’re spending! Ask anyone whose hair style you like where they get it done and book a consultation. If you immediately click with the stylist, great! If not, try to find a way to connect so that he or she understands what you’re asking for. Pictures always help! And remember to be vocal: I had to speak up so that she’d cut my curls dry instead of wet, and told her not to use shampoo on me, with which she was happy to comply. My requests solicited an irritated side glance from a male patron to my right, but then again, his hair was super boring.

Oil Slick

Hello dear readers! It’s been a while. I make a point of only posting when I have something truly worthwhile to say, so I apologize if you’ve been feeling neglected.

olive-oilI’ve come across a slew of timely new products that don’t seem to be a total waste of money and are worth the investment: Easy-to-use hair oils. They come in many different brands and consistencies with a plethora of ingredients and application techniques that offer various benefits to hair and styling. I’d feel remiss if I didn’t mention that this is not a “new hair trend” by any means. Go to the small but super important “coarse hair” section of any drugstore and you’ll see products similar to these that have been on shelves for decades. This bevy of new contenders just comes in prettier packaging with highly-marketed branding, and the oils tend to be a bit more distilled so that they don’t weigh down finer hair types.

seaspongeThe first thing you should know is that the coarser the hair, the bigger the “pores,” and the more moisture that is needed. Think of hair porosity in terms of a big sea sponge with huge divots. The holes of the sponge are big so that they can absorb a ton of liquid easily, but the water also squeezes out more easily than it does in a more condensed sponge. Hair is this way too — if it thirstily absorbs everything you put on it, it loses moisture just as easily.

Below I’ve broken down a few that I’ve tried, which I’d recommend based on hair type, and how to use them. But first, a few ground rules.

1) Concentrate on strand ends when using oils. The ends don’t get as much love from natural scalp oils, especially on a curly head, and this is a big part of what causes split ends. And don’t shortchange your shorter layers — they have ends too!

2) Just because a product says to use it on wet or damp hair only, this doesn’t mean it’s a hard and fast rule. Hair absorbs more when it’s not wet — this is common sense. When it’s wet, it has already absorbed some water. When it’s dry, it’s only absorbing what you put on it. If your ends are feeling very dry, I’d definitely recommend using oil on them when hair is not wet.

3) Regardless of what some packaging may claim, hair oils are not a replacement styling product. They can be, if you’re ok with a slightly less tame hair day, because they will not hold curls together in a cast while they dry the way gels, mousses, and creams do. For an everyday look, you should probably expect to wear hair in a braid or bun that day to hide the greeeez.

4) How much you apply depends on when you are using it. Refer to the point above. I don’t style with oils on the “first day” of a hair wash cycle. Usually it’s when I go on to a third or fourth day that I start to feel like it’s a bit dry from days without conditioner. However, with very light application, and with a lighter oil mix, you can get away with running a bit over your gelled hair without greasy side effects. We also tend to wash less in the winter, and that’s when hair needs moisture the most. You will not use oils as much in the summer, but they are a great little product to pack in the beach bag for use after chlorine or saltwater abuse!

5) Your scalp can also benefit from oils. Itchy? Painful? Flaking? All of these can be side effects of a dry scalp. Not everyone gets dandruff, and dandruff is not the only indicator of a scalp in distress. Even if you have one spot that seems especially painful, rubbing a dab of oil or conditioner on that spot will soothe it instantly. It’s like magic. So if you’re already applying it to your ends, why not go all the way? But beware — this is an application site that will make hair look pretty greasy and you may not want to do it just before stepping out for the evening or heading to work. On the weekend? Cover up the evidence with a cute bandana or hair scarf.

6) Why not just use the EVOO in my kitchen cupboard? Ahh, the million dollar question! You can do that if you spruce it up with lots of yummy-smelling quality essential oils and mix them together before application. Otherwise, you will just smell like a fry cook all day, and you may get sick of that (unless you actually are a fry cook, in which case, go for it!) This is why I recommend the homemade oil treatment as an overnight remedy, not something to leave in your hair during an average day. The products below smell amazing, so any questions regarding your hygiene should be quickly dismissed.

7) Use hair oils as often as you feel is necessary, based on hair’s absorption. There is no drawback to using them, but if you over-do it you will see that it gets super greasy because it can only absorb so much. Over-saturation serves no purpose! You will know how to toe the line with your hair as you become more accustomed to using oils.

8) Wash with a real cleanser at least once a week when you are using oils. They don’t wash out with water and conditioner like other products and environmental deposits do. Because of this, you’ll want to treat hair, and especially your scalp if you’ve used it there, to some DevaCare Low ‘Poo, No ‘Poo, Homemade Lemon Juice-Conditioner cleanser, or WEN’s cleansing conditioner during shower time.

9) Start small. A dime-sized dab in the palm will go a long way. My hair is down to the middle of my back and that’s all I usually need, concentrating on ends and mid-length. If you need more you can always add more, but add in very small increments. Rub palms together and rake the oil through hair where it’s needed most.

10) When in doubt, read the ingredients!! Google any that you don’t know and you should get a good idea of how good or bad they are for your hair. Some synthetics can be extra slick, coating strands with more shine than moisture, so it’s best to go with products that have as short an ingredient list as possible.

Now, without further ado…
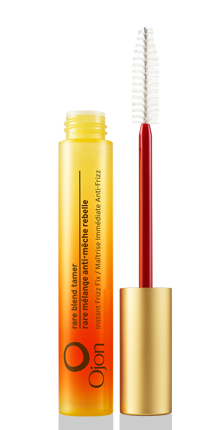
OjonWandOjon

– Course to fine type –

Ojon’s products come in two super-handy applications for all hair types. The first is in a bottle, and you can use it based on your hair’s absorption power with a dab in your palm that you rake through pretty liberally. If you need more, use it, but start small. The second applicator is like a mascara wand that can be used for flyaways. If you have a ponytail, say, and there are a few baby hairs that just won’t lie down, skim the wand over the trouble spots and they will simmer right down. This also works really well for straight-haired and short-haired ladies and gentlemen with stubborn cowlicks, so surprise your un-blessed friends with your new-found hair-saving savvy!
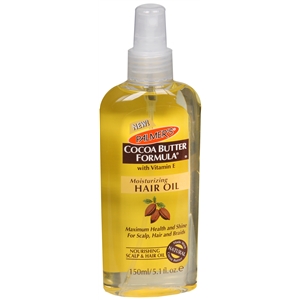
PalmersPalmers

– Coarse type –

Palmers’ products tend to be a bit on the gooey-er side, and can be used even more sparingly than the others. Coarse is not synonymous with thin — this hair type breaks more easily than all others, so oils are essential and Palmers makes a great product. Just because it comes in a spray bottle, that doesn’t mean you have to use it that way — in fact, I don’t recommend it. With a dab in the palm you are better able to control the amount that you’re using and where it’s being applied.
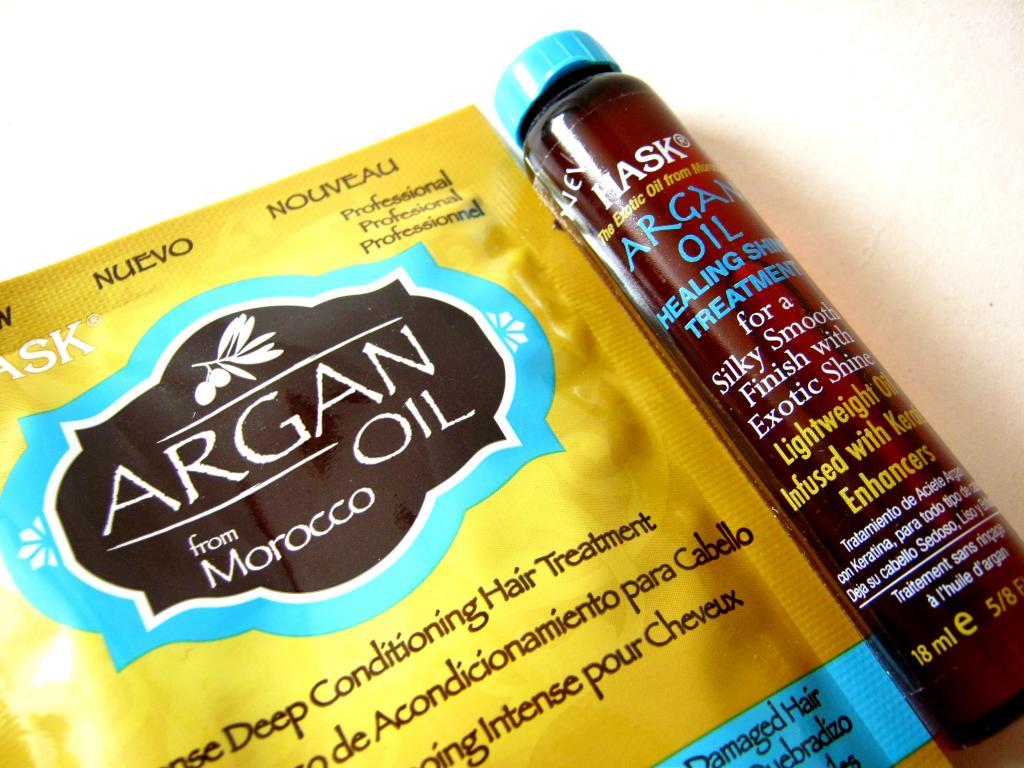
hask-argan-oil-and-hair-mask-L-oOR53vHask Argan Oil

– Coarse to fine type –

Argan Oil can be found in many product lines now, and with a variety of thicknesses and added ingredients. I like the Hask version, and it smells like a creamsicle. I use it more than any others, and it’s pretty thick so use sparingly and mainly at the ends.

moroccan-oil-treament-25ml-regularMorrocanOil

– Coarse to fine type –

MorrocanOil makes a long line of Morrocan oil products that have been widely circulated through the United States and they tend to stick to sparse, helpful ingredients. Their trademarked original oil is another example of a top notch product without too many unnecessary add-ons.

OrganixOrganix

– Medium to fine type –

Organix Penetrating Oil Renewing Moroccan Argan oil is my newest favorite for my fine hair type. It’s light enough not to look greasy, smells so good, and comes in an easy-application pump bottle. It may not offer enough oomph for coarser hair types.

Easy 5 Days Wash-Free

If your first thought upon reading this title was “Eww,” go back to Start. Do not pass Go. Once you’ve gone native, this will only feel natural and you’ll appreciate it fully!

Note: This is easier for longer-haired people, but shorter-hair-eds can do it for at least three days.

CQA-calDay 1: Do an oil treatment the night before, and use the oil and lemon juice mixture to clean it thoroughly. Wash and style hair as usual, don’t use too much product. Buildup and stickiness is what attracts dirt and dust. Before bed, put hair up in a loose pony or if it’s long, drape it up and over your pillow to keep it from getting sweaty at night.

Day 2: Spruce up your roots by turning your head upside down and using a wide-tooth oil-infused comb only at your roots. This gives lift and separates roots from your scalp for less greasiness. The rest of your hair should be nice and shiny from all of the moisturizing you’ve been doing. If it’s dry at all, add a drop of hair oil ONLY TO THE ENDS. Leave the middle alone. Apply by dropping a pea-sized amount of hair oil in your palm, rubbing palms together to warm it, and rake it through hair ends.

Day 3: Things may be getting a bit gamey. Take some dry shampoo, either chemical or organic, depending upon your preference. Spray/dust it only at the roots. Wait a minute, and fluff the roots with your fingers. Voila! Added volume. If the curls in the body of your hair are starting to look sad, wet your hands slightly and rake them through your curls. This is going to be a bit of a wild day, so maybe plan it for a Friday or Saturday. If it feels dried out at the ends, put a drop of hair oil at the ends only. Tonight you can braid it to keep it off your shoulders.

Pippi-Longstocking-pippi-longstocking-5584307-380-332Day 4: Today when you wake up your hair is probably pretty disheveled, maybe flat, and definitely not shining like it should. Braid it! I love braids, there are so many ways to wear them. First, brush your hair with a wide-tooth oil-infused comb — This is the only thing, aside from your fingers, that should ever “brush” your hair — and it will add volume. Now either French braid, side braid, braid a hair headband, braid it and wrap it around itself for a thick stylized bun, Pippi Longstocking braid it, the possibilities are endless! Accentuate with a thin bandana tied around your head if you are so inclined, or you can use a headband. I like slicking hair back with some water on top and spraying with hair spray to keep the newer growth from flying around all wily-nily. Re-braid, taking out all bobby-pins, before bedtime to keep it from getting tangled and sweaty.

Day 5: When you take your hair out of the braid today, your scalp may feel sore in some spots. This is due to dryness. Think of your scalp like the rest of the skin on your body; it needs moisturizer. Rub a dab of thick, good conditioner into the areas that are sore. If your entire scalp feels sore, rub a small amount throughout. This feels AMAZING. You can do it on any other day of the week that your scalp hurts, as well. For Day 5, if you’d used water and hair spray on top of your head yesterday, it will be kind of straight today. Put hair up in a high bun, and take any shorter layers or bangs and sweep and bobby-pin them to one side or the other of your part. Stay classy. I like to wear dangly earrings on this day to take attention away from my ‘do!

silk_pillow_cases_tiajwDone and done! Side notes to keep in mind are that dirt will definitely stick to your hair, so washing your (silk or satin) pillowcase frequently is important. I wash mine every two weeks, and more often if necessary. After you’ve done a full 5 days without washing/conditioning, you’ll want to do another mask or treatment that night. Your hair deserves it! You can also wear a hair cap that can be washed often if you want to keep “dirty” hair away from your face at night. Realize though, that it doesn’t get as dirty as you are thinking, as long as you don’t abuse product. If you’re working out or getting sweaty in any serious way, wear a sweatband just at the crown of your head to keep hair from getting super sweaty. Don’t remove it until after you shower! For daily showers, put hair up and in a shower cap.

My Waterless Week

I’m a strong believer in making lemonade out of lemons — after I’ve stomped on, cursed at, complained about, and otherwise viciously abused those lemons. That being said, when we realized that the boiler in the basement of the old building we just moved into has gone kaput, and will apparently take weeks to fix just as we’re starting to get snow and frigid temps here, I was forced to face some hard truths when it came to my hair.

I feel your pain, little guy!

First of all, who wants to sleep with a wet oil-treated head when it’s freezing in your bedroom? Not me, which doesn’t bode well for my poor wind-bedraggled mane. Second of all, no matter how much I diffuse my curls after washing them, they will always stay wet and I’ll be freezing again within a matter of minutes. Now, it’s easy for you in your warm seat atop your ivory tower to say that I should just suck it up and wear warmer clothes. But friends, when you’re in a freezing apartment at night and the cold is so bad that it’s seeping into your bones until you sit in front of a space heater for a good 20 minutes, the last thing you want is long wet hair dripping down your back or soaking through your pillow as you try to go to sleep. Washing in the morning is even worse with temperamental winds that feel like ice picks hitting you from every direction.

So the aforementioned lemons needed some sweetening. How can I find a way to have fun with this? I knew I didn’t want to straighten my hair, I could be more creative. Thus began the 1-week wash-free challenge.

Some of you will say,big deal, I go a week without washing my hair all the time.” Ladies or gents, this post is not for you. It’s for those of us whose thin hair gets quickly and easily greasy from product use, dirt and crud from city living, or sweaty work-outs. For those of you screaming “EWWW,” just remember that daily hair washings are a very new phenomenon as far as mankind is concerned, and is a product of our over-obsession with being squeaky clean and bacteria-free. Any crud in your hair is nothing compared to that on your jackets, shoes, and kitchen sponges. Also, VERY IMPORTANT: I am not saying shower-free. I am still showering and washing my body every day.

If you’re interested in how I maintained a relatively normal 7 days with work-outs, going to my office in Manhattan of all places from Monday to Friday, and doing all of my usual routine stuff, please read on for a daily play-by-play and you just may learn a trick or two.

Day 1: Sunday. I washed my hair after taking a nice jog outside. It was early enough in the day that I could sit in front of the space heater and wait for it to try completely before going anywhere. I used minimal gel, about 2/3 of what I usually use. The more product you have in your hair, the cruddier it will get.

Day 2: Monday. I woke up with clean hair; I had been careful the night before to keep it up off my neck by fanning it out over my pillow while I slept. Fluffed it up a little and left for work.

Klorane dry shampoo spray.

Day 3: Tuesday. It was starting to look a little tired, so I sprayed in some nice volumizing dry shampoo after I woke up. I prefer my natural powder brand, but in a pinch the Klorane spray brand gives you a much cleaner feeling. Fluffed up my roots and went to work.

Day 4: Wednesday. My hair held up pretty well after the dry shampoo, and I slept with a side braid to keep it off my neck and to reduce snarls. Still, when I woke up this morning my roots were feeling pretty stiff and greasy. I grabbed a boar-bristle round brush and my blow-drier. (My fabulous hair stylist/model friend taught me this trick for eliminating oil at the scalp and adding height to the roots.) I concentrated on my roots and lifted the hair with the boar-bristle brush while aiming the blow drier directly at my roots. I did this all around my head. I did not pull the brush through my hair in order to disrupt the curls as little as possible. This gave me a much more unstructured look, but I loved how full and long it appeared! Sometimes it’s ok to have a more tousled style. In order to make it a bit more organized, twist some of the curls with a slightly wet finger to add definition amidst the chaos. So far this was my favorite hair day this week!

The sock bun. Photo courtesy of Hello Giggles.

Day 5: Thursday. It was time to embrace the grease and try the famous sock bun. Looked awesome, and I wet the palms of my hands and ran them lightly over my hair around the crown (not touching the bun) and then put a light coat of gel on my palms and ran that over my hair as well. It kept frizzies in place all day. During my morning commute, in order to combat wind-fraying or impromptu humidity in the subway, I wrapped a light scarf loosely around my head.

Day 6: Friday. I woke up and felt once again that my roots needed a little lift and de-greasing. This time I reached for my Cold Spring Apothecary all natural dry shampoo made with no harmful chemicals or inhalants. I separated my hair into several different parts and sprinkled it directly onto my scalp. I then rubbed it in, carefully threading my fingers under my top canopy of hair so I wouldn’t ruffle the strands themselves. Next, I put my hair in a high pony tail so that the front of my hair maintained a little lift around the crown, and I braided the pony tail. Then I took several bobby pins and pinned the braid to the back of my head to disguise any greasiness or unkempt curls there. It kind of resembled the back of a corset, which was pretty neat! I then sprayed some hair spray around the crown of my head to keep flyaways in line.

Day 7: Saturday. I woke up for my morning run and employed the sock bun again, but this time with a much larger leg warmer instead. It was kind of funny running with this big sock on my head, but I also pinned it in place with tons of bobbies and put a thick cloth headband around my head to keep my ears warm and sweat off of my hair. When I got home I took it all down and it actually wasn’t bad! But it did need more body. So for my final act during this waterless week, I prepped to go out with my boyfriend and another couple for dinner. I grabbed a comb and started back combing my hair at the ends this time, not at the root. This gave me some extra body. Then I piled my hair up again on top of my head and smoothed back frizzies around my face, and did the leg-warmer bun again. With the added volume it looked amazing! The hair around my face was starting to look a little worn, so I drew some extra attention to the bun by wrapping a cool metallic headband I have around the base of the bun and clipping it into place. I felt very Hepburn-esque!

So here we are again at Sunday and I washed my hair the moment I woke up. I really enjoyed this experiment, and if we don’t get some serious heat in this place I can see it becoming a rather regular occurrence this winter. My hair is definitely no worse for the wear, I guess the oils from my scalp helped to keep it moisturized even without an oil treatment.

Lessons Learned:

* A week water-free isn’t so bad if you keep on top of scalp greasiness by blow drying it and using dry shampoo. Just limit aerosol use since it’s not good for you!

* Toward the end of the week, learn to work with the grease. Choose styles that require your hair to be plastered to your head, then just frizz out the ends for more body.

* The sock bun is a great way to limit sweat distribution throughout your hair while you’re working out! Just don’t use it if you’re going to be turning upside down or doing jumping jacks a lot, that could get messy.

* Wearing a scarf loosely over my hair instead of a hat elicits weird looks from strangers and co-workers. Still not going to stop doing it because it works!

* Not a single person seemed to notice that my hair was unwashed all week, and I suspect that my hair appreciated a break from the wash and dry routine.

Voila! I hope I’ve convinced you to try a waterless week yourself sometime, it really forces you to be creative, and there are lots of blogs with fun hair ideas that you should experiment with. Enjoy, and stay warm!

Start Curly

One minor thing I’d like to address is that every hair styling tip I read about in magazines instructs you to blow-dry curly hair straight first. The tousled look, for example, involves blow-drying your hair in all different directions, then curling the ends, and texturizing it with pomade. Straighten my curly hair only to curl it again? Wha…? What these articles do is convince us to buy a ton of pricey products that aren’t all that great for our hair, make our ‘do’s high-maintenance, and promise shiny frizz-free results that we all know just aren’t going to happen. Especially as the warm and humid spring and summer months approach.

Back-combing can be done with a small black comb to create height near the roots of hair. Do not comb your hair to the ends with this!

My theory is work with what you’ve got: You have curly hair and you want it tousled? Fine, tousle it. Tousle ’til your heart’s content! I picked up a new trick over the weekend that I love. I’ve already recommended using a wide-tooth comb if you absolutely need to comb your hair while it’s wet in the shower, but I was recently given an olive-oil infused wide-tooth comb that I LOVE. I haven’t combed or brushed my hair (except when straight) in almost a decade, so this is kind of a big deal. I already knew you could use a small comb (like the flimsy black ones they gave you before school pictures) to add body at the roots of your hair. It works like back-combing, you brush against the direction of the hair at the very roots and get some upward movement.

Olive oil comb--great for combing through shorter layers to loosen curls and create a more "tousled" look.

The olive-oil comb, however, is so silky-smooth and non-invasive that I find I can use it with my shorter layers, like bangs, and also use it to back-comb for body on the crown of my head. It loosens up my curls, making them look a bit more fun and frisky instead of orderly and controlled. If you want to add texture try spritzing with some spray gel or the Coldstone Apothecary salt-water spray I mention on the products page once you’ve achieved your desired look.

If you do choose to gently comb through your hair to the ends with the wide-tooth comb, wrap unruly curls around your finger to eliminate frizz.

Also, once you’re done combing and before you use product, try finger-curling the rowdier pieces to make the hair come together in harmony again instead of being too frizzy. The amount of combing you do depends completely on how much of a statement you want to make, and over time you may find yourself doing it more and more. It’s also a great way to add height to hair that has dried somewhat flat on top.