The Wedding Issue

kiss

I’m not one for PDA, but my hair looks good here.

As promised long ago, this is the post that will detail the way that I chose to do my hair for my wedding. The fabulous Amy from Arte Salon in Soho, NYC was my guide, and we practiced the style twice before I did it myself on my wedding day. I had to be thrifty and I also know that I’m one of the few people who can style my hair the way I like it, so I didn’t want to take the chance of having a hairstylist upstate try to make me look like a porcelain doll with fake-looking hair.

I should go into this saying that I wanted volume, and I wanted a slightly “undone” look to match my country wedding in the Catskills. It also matches who I am, and I firmly believed that I should look like a done-up version of myself on my wedding day. Not fussy and constricted. I even wore cowboy boots with my dress.

But I digress! Below are the steps and materials that I needed to do my ‘do.

Materials:

– $40 fake hair extensions

– Lots of bobby pins

– Hair adornment from BHLDN, purchased on Tradesy.com, my new-found BFF.

– Hair spray

– A borrowed $200 Mason Pearson brush

Method:

When you are manipulating your hair, it is best to work on second-day hair. You want it to be a little “dirty” because it will hold styling better than clean hair. I ended up washing my hair the morning of, but it probably would have been better if I hadn’t.

1) Tease out dry hair using the Mason Pearson brush, or another dense boar-bristle brush. Learn how to tease your hair correctly to minimize breakage. There will be breakage, so this isn’t something you’ll want to do often. You basically back-brush hair at the roots until it is very ratty and fluffed up, and then lightly skim the brush over the top of the hair to smooth down the exterior. The idea is to build volume, so you want to do it in the areas where you need the most bulk: on top of your head, around the crown, and on the sides. The benefits of a Mason Pearson is that they use about three different types of bristles and it works well to stimulate your scalp to distribute oils and make hair shinier and ultimately healthier. Note: Don’t ever blow-dry while using this brush because some of the rubber bristles will melt.

2) If you’re using clip-in extensions, put them in now, after you’ve teased the parts of your natural hair that you wanted to tease. Hair should be at its full volume. If you purchase real hair, you can curl it. If you get synthetic, you can’t. You also can’t tease synthetic because it won’t hold. I found this out a bit late, but was able to work it into my braid and blend in enough of my real hair to make it look natural.

hair-pins

Hard to see, but I made little triangles going up the back of my hair with groups of three interconnected bobby pins. They are stronger when working as a team!

3) Create an armature (shown here, third one down) at the back of your head using many criss-crossed bobby pins. This is similar to the way you’d do your hair in a French Twist. It’s basically just interconnecting them to make a support to hold up lots of hair in a way that’s more supportive than just using free-standing bobby pins scattered around. Then you will sweep other, loose hair over the armature and pin that into place to hide the armature.

4) Braid the hair that is left hanging. Loop the end instead of leaving a loose rat-tail look, or if you have real hair you can curl the end.

This is toward the end of the night and things were getting messy. But you can see my hair pretty well here, so I shared it. That's how much I care about you all.

Drunk.

5) Take a final look and make sure nothing is sticking out anywhere that it shouldn’t be, use a curling iron to curl any loose tendrils, and place hair around your face the way you want to. If you have fine hair and choose to use a curling iron for loose pieces, those pieces will probably be straight by the end of the night. I should have just wet my loose pieces and let them air dry rather than try to curl them, but I wanted big, beautiful curls!

6) Add any hair pieces to your ‘do, and voila! Since I did a side braid, I put my piece on the side with the braid and tried to make that side of my head visible when I was coherent enough to think of it.

Ultimately I loved my unkempt, messy hair look mixed in with a few shiny, well-coiled and curled strands. The look is supposed to be un-fussy, slightly glamorous, and natural-looking. Oh, the irony!

How do you like it? What would you have done differently? Have you done something similar with your hair?

The Oil Treatment to End All

Hey folks! Well, we are in the final countdown to my much-anticipated wedding. It’s this Sunday and I will have a full report for you, along with pics of my hair style. I’m heading over to Arté Salon today to practice the style one more time with Amy, and then I’m on my own. She doesn’t do wedding hair, but has been practicing with me so that I can feel more confident doing it myself up in the mountains on the big day. I was reassured recently that I’m doing the right thing by styling my own hair at the wedding — no one has ever given me a fancy hairstyle that I like. Gotta take it into my own hands!

Image courtesy of NaturallyCurly.com

Image courtesy of NaturallyCurly.com

Before we get to all that, of course I have also been prepping my hair for the grand occasion. This includes split end trims (done in my bathroom at home, of course) and lots of conditioning, but most importantly, I’ve been going to Bliss Spa (Soho, NYC) for face and body treatments and I always add my favorite indulgence — Hair Dew. It is by far the very best hair treatment that I’ve ever had. The good news is, I’ve slowly broken down my treatment specialists and I HAVE THE RECIPE! It’s not expensive to get it done at Bliss, it’s about $35, so I highly recommend it if you ever go because they do a nice head massage. However, you can only get it as an add-on to other (more expensive) services.

The alternative is to buy the expensive ingredients and do it at home yourself as you wish. I’ll leave that decision up to you. But suffice it to say, this is the best oil treatment I’ve ever had! It has a balancing oil for your scalp (extra helpful if you tend to have a dry or itchy scalp) and amazing botanicals for the hair. This is A+ stuff, baby. So without further ado…

Ingredients:

Phyto Botanical Scalp Treatment

Phytocitrus Color Protect Radiance Mask

Phytosesame Hydrating Cream for Dry Hair

Procedure:

Start with dry hair, and it doesn’t matter how clean or greasy it is. First apply the Scalp Treatment. This comes with a pipette which is used to apply the stuff directly to your scalp. Use one full pipette per treatment. Place tip directly on scalp at varied locations and squeeze some out in each spot. My experience has been 7-8 sites on the scalp works best. Next, apply the Radiance Mask throughout hair. Lastly, apply the Hydrating Cream to the ends. Experiment with how much you use, based on hair length and thickness, but err on the less-is-more side since this stuff is $$$.

Once all has been applied, rub your scalp and give yourself a nice massage. If your hair is long or not staying put with all that cream in it, tie it up with an elastic band (alternatively — a less harsh tie that works well is the ends of sleeves on old t-shirts. Just cut them off in inch-thick strips and you have a round elasticy-but-soft hair tie.) Put on a shower cap or tie a plastic bag over your hair if you’re on a budg or like to upcycle. If you’re super attentive, put a heated cap or hot towel over your hair to open pores for better absorption. Let this whole thing sit for 20-30 minutes. You may also decide to sleep with the treatment on, which is what I do. Up to you! Take the heated cap or towel off before sleeping and tie a bandana or old scarf over your shower cap to keep it on straight and avoid staining sheets and pillows.

Wash out the whole mixture with 4 tablespoons lemon juice and equal parts conditioner, massaging into scalp. I’d suggest your least expensive conditioner for this step since it’s not in your hair for long, and its main purpose is to tone down the acidity in the lemon juice. Note: This will not make your hair blonde because you will thoroughly wash it out immediately after applying. Think of it as a shampoo. Do not leave it on for more than a few minutes.

Enjoy!

Voila! Your hair will be silky and amazing. I do this maybe a few times a year since it’s so expensive and is a lot of work. I’d suggest doing it a few days before any big event. Your hair has never been so shiny, believe me! One final note: Do not shy away from products that are for color-treated or very damaged hair even if yours is not. These just have more concentrated amounts of the good stuff and your hair will absorb it just as much as damaged strands. If you are ever choosing between two similar conditioning products and one is for damaged hair while one is for normal/dry, go for damaged.

Visit NaturallyCurly.com for more hair oil ideas!

In the name o3E2EBF0257E4D537FA90FA_Largef treatments and laughs, a tribute to one of America’s sweethearts. Thanks for everything you’ve contributed, Mr. Williams. You will be always be remembered. Who could forget the pie treatment mask?


Oil Slick

Hello dear readers! It’s been a while. I make a point of only posting when I have something truly worthwhile to say, so I apologize if you’ve been feeling neglected.

olive-oilI’ve come across a slew of timely new products that don’t seem to be a total waste of money and are worth the investment: Easy-to-use hair oils. They come in many different brands and consistencies with a plethora of ingredients and application techniques that offer various benefits to hair and styling. I’d feel remiss if I didn’t mention that this is not a “new hair trend” by any means. Go to the small but super important “coarse hair” section of any drugstore and you’ll see products similar to these that have been on shelves for decades. This bevy of new contenders just comes in prettier packaging with highly-marketed branding, and the oils tend to be a bit more distilled so that they don’t weigh down finer hair types.

seaspongeThe first thing you should know is that the coarser the hair, the bigger the “pores,” and the more moisture that is needed. Think of hair porosity in terms of a big sea sponge with huge divots. The holes of the sponge are big so that they can absorb a ton of liquid easily, but the water also squeezes out more easily than it does in a more condensed sponge. Hair is this way too — if it thirstily absorbs everything you put on it, it loses moisture just as easily.

Below I’ve broken down a few that I’ve tried, which I’d recommend based on hair type, and how to use them. But first, a few ground rules.

1) Concentrate on strand ends when using oils. The ends don’t get as much love from natural scalp oils, especially on a curly head, and this is a big part of what causes split ends. And don’t shortchange your shorter layers — they have ends too!

2) Just because a product says to use it on wet or damp hair only, this doesn’t mean it’s a hard and fast rule. Hair absorbs more when it’s not wet — this is common sense. When it’s wet, it has already absorbed some water. When it’s dry, it’s only absorbing what you put on it. If your ends are feeling very dry, I’d definitely recommend using oil on them when hair is not wet.

3) Regardless of what some packaging may claim, hair oils are not a replacement styling product. They can be, if you’re ok with a slightly less tame hair day, because they will not hold curls together in a cast while they dry the way gels, mousses, and creams do. For an everyday look, you should probably expect to wear hair in a braid or bun that day to hide the greeeez.

4) How much you apply depends on when you are using it. Refer to the point above. I don’t style with oils on the “first day” of a hair wash cycle. Usually it’s when I go on to a third or fourth day that I start to feel like it’s a bit dry from days without conditioner. However, with very light application, and with a lighter oil mix, you can get away with running a bit over your gelled hair without greasy side effects. We also tend to wash less in the winter, and that’s when hair needs moisture the most. You will not use oils as much in the summer, but they are a great little product to pack in the beach bag for use after chlorine or saltwater abuse!

5) Your scalp can also benefit from oils. Itchy? Painful? Flaking? All of these can be side effects of a dry scalp. Not everyone gets dandruff, and dandruff is not the only indicator of a scalp in distress. Even if you have one spot that seems especially painful, rubbing a dab of oil or conditioner on that spot will soothe it instantly. It’s like magic. So if you’re already applying it to your ends, why not go all the way? But beware — this is an application site that will make hair look pretty greasy and you may not want to do it just before stepping out for the evening or heading to work. On the weekend? Cover up the evidence with a cute bandana or hair scarf.

6) Why not just use the EVOO in my kitchen cupboard? Ahh, the million dollar question! You can do that if you spruce it up with lots of yummy-smelling quality essential oils and mix them together before application. Otherwise, you will just smell like a fry cook all day, and you may get sick of that (unless you actually are a fry cook, in which case, go for it!) This is why I recommend the homemade oil treatment as an overnight remedy, not something to leave in your hair during an average day. The products below smell amazing, so any questions regarding your hygiene should be quickly dismissed.

7) Use hair oils as often as you feel is necessary, based on hair’s absorption. There is no drawback to using them, but if you over-do it you will see that it gets super greasy because it can only absorb so much. Over-saturation serves no purpose! You will know how to toe the line with your hair as you become more accustomed to using oils.

8) Wash with a real cleanser at least once a week when you are using oils. They don’t wash out with water and conditioner like other products and environmental deposits do. Because of this, you’ll want to treat hair, and especially your scalp if you’ve used it there, to some DevaCare Low ‘Poo, No ‘Poo, Homemade Lemon Juice-Conditioner cleanser, or WEN’s cleansing conditioner during shower time.

9) Start small. A dime-sized dab in the palm will go a long way. My hair is down to the middle of my back and that’s all I usually need, concentrating on ends and mid-length. If you need more you can always add more, but add in very small increments. Rub palms together and rake the oil through hair where it’s needed most.

10) When in doubt, read the ingredients!! Google any that you don’t know and you should get a good idea of how good or bad they are for your hair. Some synthetics can be extra slick, coating strands with more shine than moisture, so it’s best to go with products that have as short an ingredient list as possible.

Now, without further ado…

OjonWandOjon

– Course to fine type –

Ojon’s products come in two super-handy applications for all hair types. The first is in a bottle, and you can use it based on your hair’s absorption power with a dab in your palm that you rake through pretty liberally. If you need more, use it, but start small. The second applicator is like a mascara wand that can be used for flyaways. If you have a ponytail, say, and there are a few baby hairs that just won’t lie down, skim the wand over the trouble spots and they will simmer right down. This also works really well for straight-haired and short-haired ladies and gentlemen with stubborn cowlicks, so surprise your un-blessed friends with your new-found hair-saving savvy!

PalmersPalmers

– Coarse type –

Palmers’ products tend to be a bit on the gooey-er side, and can be used even more sparingly than the others. Coarse is not synonymous with thin — this hair type breaks more easily than all others, so oils are essential and Palmers makes a great product. Just because it comes in a spray bottle, that doesn’t mean you have to use it that way — in fact, I don’t recommend it. With a dab in the palm you are better able to control the amount that you’re using and where it’s being applied.

hask-argan-oil-and-hair-mask-L-oOR53vHask Argan Oil

– Coarse to fine type –

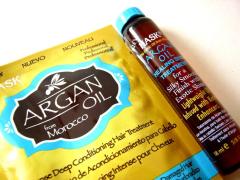
Argan Oil can be found in many product lines now, and with a variety of thicknesses and added ingredients. I like the Hask version, and it smells like a creamsicle. I use it more than any others, and it’s pretty thick so use sparingly and mainly at the ends.

moroccan-oil-treament-25ml-regularMorrocanOil

– Coarse to fine type –

MorrocanOil makes a long line of Morrocan oil products that have been widely circulated through the United States and they tend to stick to sparse, helpful ingredients. Their trademarked original oil is another example of a top notch product without too many unnecessary add-ons.

OrganixOrganix

– Medium to fine type –

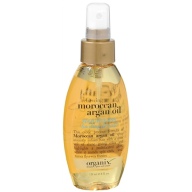
Organix Penetrating Oil Renewing Moroccan Argan oil is my newest favorite for my fine hair type. It’s light enough not to look greasy, smells so good, and comes in an easy-application pump bottle. It may not offer enough oomph for coarser hair types.

So Long!

I’ve been fielding a lot of questions lately about growing long curly hair. Mine is down to the middle of my back when wet, with a ton of layers and craziness going on that gets quite out of control between cuts. I actually love the “disheveled” look, but the other positive side to this is that my hair is given plenty of resting time between cuts. I get my hair cut about once every 7 months — partially due to the abnormal expense of my hair cuts, and also to the fact that I want it to be as long and full as possible before my wedding next year.

engaged<< Surprise! My amazing boyfriend asked me to marry him in late August and we look forward to a late-August early-September 2014 wedding. I will keep everyone updated on wedding hair ideas! In the meantime, follow my Pinterest board on the subject, and if you follow my board I’ll follow you right back! Ideas welcome. >>

When I went for my 7-month re-shaping cut at Devachan, I decided to get my $140 worth and asked the fantastic curly hair specialist for some tips on growing longer hair. I felt vindicated to hear that I’m doing all of these already, and am outlining them below for all of you! Please post any questions in the comments below and I’ll either answer them myself or ask a professional.

Condition a LOT! And more than that! Deep condition or use an oil treatment at least once a week. Curly hair is very prone to breakage, so keeping tendrils saturated is the best way to fight premature splitting. But… this tends to clog the shower drain. Something about the oils or the thick conditioner streaming out of your hair en masse can really gum things up. My plumber recommends filling a bucket with the hottest water possible and dumping it slowly down the drain when it starts to back up. Then run the hot water out of the faucet for a few minutes. That usually does it for me! Intermittent hair removal will also be necessary, as is routine, but you should do your best to catch as much as you can before it goes down the drain. BTW: Don’t fret if you gather more than your straight-haired sisters, curly hair doesn’t fall out as much as straight hair throughout the day since we don’t brush it and it gets tangled up in the curls. It all comes out at once in the shower!

blow-frierDitch the drier! Blow friers cause more breakage than anything, but nobody likes going outside with wet hair — especially in cold and inclement weather. The alternative, which I’ve posted about before, is to wash your hair the night before, bundle up and let it dry while you watch TV or eat dinner for an hour or two, and then go to bed and drape your hair up and over the pillow. If it’s too short for this, it should be mostly dry in a couple of hours anyway, and just do your best to keep it from smooshing against the pillow too much while you sleep. This is a great way for hair to dry undisturbed by the elements, making it shinier and with added volume from drying in a horizontal position (no gravity weighing down on the roots). But… some people are restless sleepers. For you, I’d still wash hair in the evening and give it as much time as possible to dry before you go to sleep. There is less friction between the sheets when you sleep on a satin pillow case! And on that subject…

53380109096cSleep on silk or satin pillowcases. I’ve covered this many times, but I can never mention it enough. Silk or satin pillows are a hair saver. Everyone rolls around and does all kinds of crazy dance moves in their sleep, and hair takes the brunt of the friction and damage. If you’re sleeping on a cotton or similar pillowcase it will cause major frizz and damage. If you’re serious about growing your hair out, get a silk or satin pillow case right now!

braided_hairNo fuss, no muss. Hair likes to be left alone. Don’t overdo it. Don’t color, don’t blow fry, don’t over-wash, etc. Ancient Egyptians braided their hair to give it periods of rest, in a similar style to the cornrows and dreadlocks that we see today. When hair is in a braid it is not as affected by wind and sun damage, and we don’t pick at it or brush it or do anything else that may harm and break it. If you’re having a bad hair day and it’s not time for a wash, just go for a fun braid. Hair should be able to go at least three days between washes, and that includes those of you who sweat on the regular. If you’re outside getting dirty just cover hair with a bandana. I do it all the time.

Don’t stress! Easy for me to say, right? WRONG! I am a person who has been diagnosed with generalized anxiety disorder that has affected almost every area of my life at some point or another. Through a nutritionist-recommended diet, lots of exercise and yoga, as well as bouts with meditation (not medication!), therapy, hypnosis, and acupuncture I have been able to manage my anxiety and I think that you can too. Everyone has stress in varying amounts, and it’s not the easiest thing to manage and may require prescribed chemical interference, but for your hair’s sake and for your HEALTH’S sake, please take every measure possible until you’ve found a way to minimize stress. Change something, do something that makes you happy. YOLO. Find a new perspective.

scissorsFind the right stylist. This requires major emphasis. Your stylist should know that you’re trying to grow your hair out, that you want it to be full and without short layers that can make hair look sparse. Depending on how much hair you have and how thick it is, this will be different for everyone. As long as he or she knows that you are growing your hair and want to take off as little as possible from the ends, and you have been taking great care to minimize split ends that cause breakage, there should not be a problem. As always, stylists must cut hair when it’s dry in order to see what they are taking off and how it will look when you’re out on the town being fabulous.

Marie-AntoinetteDon’t lose your head. Many lose faith when they embark upon years of hair-growing. It’s a lot of extra work and there will be times that you think your hair will look much better if you just cut it short again. The fact is, curly hair looks better the longer it gets if you have the right cut, and like anything, it goes through awkward stages. You’ll go through many of these ups and downs, but as with children, just realize that as long as you’re patient and wait a couple of months it will be totally different. Be sure before you chop, so you don’t find yourself back at the beginning fretting about your hair never being able to grow out! Eliminating breakage using the steps above will make it possible to go longer between cuts so you won’t always feel like you’re taking one step forward and two steps back.

**Good luck and have fun!**

CQA Interview: Michael

Super-star hairstylist and founder of Hair Room Service Michael Dueñas answers some of Curly Q&A’s hard hitting questions. Dueñas has specialized in curly hair care for years, and I met him when he was working at Devachan in Soho, NYC. He’s found a new creative outlet in the form of his upscale at-home hairstyling business, and his impressive client list includes Lady Gaga, Mariah Carey, Kim Catrall, the lovely Susan Sarandon (one of my favorite curly girls), the cast of Glee, and many more.

michaelCurly Q&A: What is the first thing that you’d tell hairdressers about cutting curly hair?
Michael: Each individual curl pattern is different, and has to be analyzed and cut accordingly.

CQA: What initially interested you about cutting and styling curly hair?
M: It is completely different than straight hair in every aspect, it was a new challenge and curly girls need some serious help!

CQA: What are your favorite frizz-fighting techniques/products?
M: The best way to fight frizz is with moisture! If you style your hair with a moisturizing product, your chance of a frizz explosion is very minimal. Your hair reaches out to the atmosphere for moisture (which causes frizz), so if you provide it with the moisture it needs, it will no longer reach out. The everyday conditioner that you use in the shower is great for controlling frizz! Schwarzkopf Professional BC Moisture Kick Conditioner is amazing for fighting frizz. It gives your hair exactly what it needs!

CQA: What would you say to curly-haired ladies who are unsure about removing traditional and inexpensive sulfate shampoos from their beauty regimen?
M: Sulfates have become so gentle that there is a not a fear if they are in the shampoo.  It was a big band wagon that everyone jumped on before conclusive evidence was brought forward. Some sulfates can actually add moisture!
(Editors note: this is why I’m always encouraging Googling ingredients. Some sulfates, especially those used in inexpensive drugstore brands, will not use quality ingredients in order to keep them cheap. Others are derived from natural additives and are perfectly safe. This applies to chloride compounds as well. Google away!)

CQA: How often should we cleanse our hair, and what do you recommend using to do so?
M: You should cleanse your hair 1 – 2 times a week at the most. The natural oils from your scalp will help to nourish your hair and provide it with the moisture it needs. Using a gentle shampoo, a soft cleanser or even baking soda mixed with water works. You do not want to use anything drying such as a product with tea tree or a volume shampoo.

CQA: How often should curly girls oil treat their hair?
M: Every time you dry your hair. Adding an oil to your pre-dry routine will help to add tremendous amounts of moisture!

CQA: What are your favorite products for curly hair?
M: My favorite products are BC Oil Potion Light, BC Moisture Kick, OSiS Twin Curl, Deva One Condition, and BC Smooth Control Conditioner.

936full-andie-macdowell

CQA: Which celebrity has your favorite curly hair, and why?
M: Andie MacDowell.  She is one of the few who will wear her natural curls without using a curling iron!

CQA: Any other tips for newly converted curly girls?
M: Give yourself a few days to get used to them. The first time you style it won’t be the best, it is always a learning curve! The more you do it, the more freedom from the flat iron and blow dryer you will see! Your hair will get so healthy that you can run your fingers though it while curly! (Editors note: True story.) Curls are fun!

CQA Interview: Katrina

Katrina-Curls1Curly Q&A: I love your hair, what would you say are some of the biggest physical challenges of maintaining natural hair? (rather than using extensions, keeping it very short, or chemically relaxing it)
Katrina: Thank you for the compliment! The only physical challenge I would say about maintaining my natural hair versus a relaxer or extensions is that I have to wet, condition and comb through my hair every day or every other day at the least because it tangles very easily. Otherwise, my hair is really easy to maintain because I pretty much wash and go.

CQA: What are your favorite products, and what do you use them for specifically?
K: I’ve tried a lot of products as I am sure most curly hair girls have. I really like the Ouidad products, especially the conditioner. These products are designed for curly hair. I also love Carol’s Daughter hair milk, it’s a leave-in cream with oil in it but it’s not oily. I like my hair to feel free so I look for products that are moisturizing without being oily. I also like Argan oil, but not too much, and if I put Argan oil in my hair I don’t use any other creams or oils. I also like Phyto products; especially the hair mask, which is only used once a week.

CQA: Do you have any particular styling tips?
K: The styling tip that works for me is to always apply product when hair is wet and never dry your hair upside down with a towel because this creates frizz. I use a towel to dry the ends of my hair. Once it’s dry, then you can flip it so your hair is not sticking to your head; you can lift the roots that way.

CQA: How often do you do oil treatments? Do you have any favorite types? What is your oil treatment method?
K: I have done oil treatments but not every week. I like Phyto hair mask as an oil treatment. I have also heard of girls that use mayonnaise, egg yolks and avocado as an oil treatment. I haven’t tried that, but since I’m always looking for inexpensive ways to treat my hair, I just might!

CQA: I love your hair cut! How often do you cut it, and do you have a favorite salon/hairdresser? Do you cut it dry or wet?
K: Thank you! I cut my hair when I feel that it needs it. I like the way that Rayna at Cutler hair salon in Soho cuts my hair; she understands curly hair. I’ve also had it cut at a local Dominican Salon in Florida and they did a good job. I’ve had it cut wet and dry and I would say dry is definitely better because you can see the shape of the hair.

Katrina-Curls2CQA: Curly hair can so often be used as a sociopolitical statement. Have you ever felt that you were treated differently because of your naturally curly hair?
K: Yes, there is one situation that stands out in my mind. I’m a model, and I was on a very high end hair job; the hair stylist that they flew in all the way from Paris kept complaining about my hair. Keep in mind that I had gone on a casting and 2 callbacks for this job, and my hair had been thoroughly inspected and fine-tooth combed (no pun intended) for me to get this job. I was also chosen out of about 50 girls, so the client was very sure about me. This “big shot” hair stylist kept saying, “You have a tough head of hair!” and she kept going on and on about how she doesn’t use products and in Paris they don’t use hair like this for hair jobs. She had also written a “hair book” and in this book there was not one curly-haired girl. I thought to myself, “Some hairdresser, she doesn’t even acknowledge curly hair! How can you call yourself a hair stylist and not include every type of hair under the sun in your book!!” Anyway, I just smiled and thanked God that I was blessed with curly hair that I was being paid to advertise.

CQA: She was obviously jealous. Are there any other tips or tricks that you’d like to share with Curly Q&A readers?
K: I would like to add that on my off days I like to wash my hair, put product in, and keep it in a braid. When it dries and I pull my braid out, it’s beautiful and wavy! Whether you are born with straight or curly hair, embrace what you’re blessed with!

Product Update: Curl Creme

frizz-cremeThis past weekend I had the pleasure of partaking in a new hair maintenance product thanks to Sephora samples that were sent to me along with my most recent perfume purchase. (They sent me like, 8 amazing samples, btw. The best two were birthday gifts, but the others were just included in my purchase.) Now, if you’ve been reading my blog, you probably know that, for me, the basics have always been rich conditioner and a hearty gel. I’ve most definitely learned that mousse is not a friend of mine (leaves hair frizzy and sticky), and creams have always left my hair feeling overdone and clumpy.

I decided to try this curl creme sample because I was going for a post-oil-treatment, post-chlorine-and-sun-abuse lazy Sunday afternoon look. I figured it would just give me some nice shine and maybe eventually I’d have to put my hair up when it got insanely frizzy. Friends, I couldn’t bring myself to put it up, even later when I’d gone for a long sweaty bike ride! I don’t know the last time my hair has looked that good, seriously. It was definitely post-treatment too, which made it feel less product-y, but it was above and beyond the norm. I highly recommend it.

Below is how I used: Living Proof Nourishing Styling Cream

  1. Aprés-swim, I used some Devachan No-Poo to rid my hair of chlorine without drying it out even further with a detergent-heavy shampoo.
  2. I saturated my wrung-dry hair with MoroccanOil Restorative Hair Mask, and rubbed it into my scalp. Note: I alternate my treatments so that my hair doesn’t get too used to any one thing. The most effective is the homemade oil treatment, but it’s best to switch it up now and then for maximum benefit. Heavy oils are less needed in the summer months.
  3. I covered my hair with the usual treatment cap, tied it on with a bandana over the top, and went to sleep.
  4. The next morning I concocted the 4 tbsp. conditioner/4 tbsp. lemon juice mixture and poured that over my hair, concentrating on working it into my scalp, distributing it through my hair, and then thoroughly rinsing it all out. You don’t want any lemon juice left in your hair. I used my Aussie Moist conditioner for the cleansing mixture since it’s a decent and inexpensive conditioner that won’t be sitting on your hair for too long anyway.
  5. After rinsing, I applied one more slap of one of my new favorite conditioners, Avalon Organics Conditioner Volumizing Rosemary. It smells like I’m in a spa and works really well in rotation with my other two favorites: Creme of Nature Argan Oil Intensive Conditioning Treatment and Devachan’s One Condition. Again, you don’t want to use the same exact products every day. Rotating products, while keeping one styling product and one conditioner as your staples, keeps hair fresh and moisturized. I always apply conditioner to the middle and ends of my hair while my head is upside down in the shower, and then rinse it out about half way. Wring hair dry with your hands.
  6. I normally add in my base gel at this point, but instead I got out of the shower, toweled off, and raked Living Proof’s creme through my hair in a very haphazard way. Some of you may have noticed before, this is often the beginning of great hair days — not caring! Curly hair definitely has a sense of humor.

Without further fiddling, I let it dry throughout the day, and I didn’t even use clips at the roots for vertical body. It created the most beautiful curls on the hottest and most humid day that I’ve ever experienced in NYC. Zero frizz, my friends. This after a sweaty bike ride, a night sleeping on it, and a spin class the next day. Still going strong and still smelling amazing. This one is worth a try!

My Waterless Week

I’m a strong believer in making lemonade out of lemons — after I’ve stomped on, cursed at, complained about, and otherwise viciously abused those lemons. That being said, when we realized that the boiler in the basement of the old building we just moved into has gone kaput, and will apparently take weeks to fix just as we’re starting to get snow and frigid temps here, I was forced to face some hard truths when it came to my hair.

I feel your pain, little guy!

First of all, who wants to sleep with a wet oil-treated head when it’s freezing in your bedroom? Not me, which doesn’t bode well for my poor wind-bedraggled mane. Second of all, no matter how much I diffuse my curls after washing them, they will always stay wet and I’ll be freezing again within a matter of minutes. Now, it’s easy for you in your warm seat atop your ivory tower to say that I should just suck it up and wear warmer clothes. But friends, when you’re in a freezing apartment at night and the cold is so bad that it’s seeping into your bones until you sit in front of a space heater for a good 20 minutes, the last thing you want is long wet hair dripping down your back or soaking through your pillow as you try to go to sleep. Washing in the morning is even worse with temperamental winds that feel like ice picks hitting you from every direction.

So the aforementioned lemons needed some sweetening. How can I find a way to have fun with this? I knew I didn’t want to straighten my hair, I could be more creative. Thus began the 1-week wash-free challenge.

Some of you will say,big deal, I go a week without washing my hair all the time.” Ladies or gents, this post is not for you. It’s for those of us whose thin hair gets quickly and easily greasy from product use, dirt and crud from city living, or sweaty work-outs. For those of you screaming “EWWW,” just remember that daily hair washings are a very new phenomenon as far as mankind is concerned, and is a product of our over-obsession with being squeaky clean and bacteria-free. Any crud in your hair is nothing compared to that on your jackets, shoes, and kitchen sponges. Also, VERY IMPORTANT: I am not saying shower-free. I am still showering and washing my body every day.

If you’re interested in how I maintained a relatively normal 7 days with work-outs, going to my office in Manhattan of all places from Monday to Friday, and doing all of my usual routine stuff, please read on for a daily play-by-play and you just may learn a trick or two.

Day 1: Sunday. I washed my hair after taking a nice jog outside. It was early enough in the day that I could sit in front of the space heater and wait for it to try completely before going anywhere. I used minimal gel, about 2/3 of what I usually use. The more product you have in your hair, the cruddier it will get.

Day 2: Monday. I woke up with clean hair; I had been careful the night before to keep it up off my neck by fanning it out over my pillow while I slept. Fluffed it up a little and left for work.

Klorane dry shampoo spray.

Day 3: Tuesday. It was starting to look a little tired, so I sprayed in some nice volumizing dry shampoo after I woke up. I prefer my natural powder brand, but in a pinch the Klorane spray brand gives you a much cleaner feeling. Fluffed up my roots and went to work.

Day 4: Wednesday. My hair held up pretty well after the dry shampoo, and I slept with a side braid to keep it off my neck and to reduce snarls. Still, when I woke up this morning my roots were feeling pretty stiff and greasy. I grabbed a boar-bristle round brush and my blow-drier. (My fabulous hair stylist/model friend taught me this trick for eliminating oil at the scalp and adding height to the roots.) I concentrated on my roots and lifted the hair with the boar-bristle brush while aiming the blow drier directly at my roots. I did this all around my head. I did not pull the brush through my hair in order to disrupt the curls as little as possible. This gave me a much more unstructured look, but I loved how full and long it appeared! Sometimes it’s ok to have a more tousled style. In order to make it a bit more organized, twist some of the curls with a slightly wet finger to add definition amidst the chaos. So far this was my favorite hair day this week!

The sock bun. Photo courtesy of Hello Giggles.

Day 5: Thursday. It was time to embrace the grease and try the famous sock bun. Looked awesome, and I wet the palms of my hands and ran them lightly over my hair around the crown (not touching the bun) and then put a light coat of gel on my palms and ran that over my hair as well. It kept frizzies in place all day. During my morning commute, in order to combat wind-fraying or impromptu humidity in the subway, I wrapped a light scarf loosely around my head.

Day 6: Friday. I woke up and felt once again that my roots needed a little lift and de-greasing. This time I reached for my Cold Spring Apothecary all natural dry shampoo made with no harmful chemicals or inhalants. I separated my hair into several different parts and sprinkled it directly onto my scalp. I then rubbed it in, carefully threading my fingers under my top canopy of hair so I wouldn’t ruffle the strands themselves. Next, I put my hair in a high pony tail so that the front of my hair maintained a little lift around the crown, and I braided the pony tail. Then I took several bobby pins and pinned the braid to the back of my head to disguise any greasiness or unkempt curls there. It kind of resembled the back of a corset, which was pretty neat! I then sprayed some hair spray around the crown of my head to keep flyaways in line.

Day 7: Saturday. I woke up for my morning run and employed the sock bun again, but this time with a much larger leg warmer instead. It was kind of funny running with this big sock on my head, but I also pinned it in place with tons of bobbies and put a thick cloth headband around my head to keep my ears warm and sweat off of my hair. When I got home I took it all down and it actually wasn’t bad! But it did need more body. So for my final act during this waterless week, I prepped to go out with my boyfriend and another couple for dinner. I grabbed a comb and started back combing my hair at the ends this time, not at the root. This gave me some extra body. Then I piled my hair up again on top of my head and smoothed back frizzies around my face, and did the leg-warmer bun again. With the added volume it looked amazing! The hair around my face was starting to look a little worn, so I drew some extra attention to the bun by wrapping a cool metallic headband I have around the base of the bun and clipping it into place. I felt very Hepburn-esque!

So here we are again at Sunday and I washed my hair the moment I woke up. I really enjoyed this experiment, and if we don’t get some serious heat in this place I can see it becoming a rather regular occurrence this winter. My hair is definitely no worse for the wear, I guess the oils from my scalp helped to keep it moisturized even without an oil treatment.

Lessons Learned:

* A week water-free isn’t so bad if you keep on top of scalp greasiness by blow drying it and using dry shampoo. Just limit aerosol use since it’s not good for you!

* Toward the end of the week, learn to work with the grease. Choose styles that require your hair to be plastered to your head, then just frizz out the ends for more body.

* The sock bun is a great way to limit sweat distribution throughout your hair while you’re working out! Just don’t use it if you’re going to be turning upside down or doing jumping jacks a lot, that could get messy.

* Wearing a scarf loosely over my hair instead of a hat elicits weird looks from strangers and co-workers. Still not going to stop doing it because it works!

* Not a single person seemed to notice that my hair was unwashed all week, and I suspect that my hair appreciated a break from the wash and dry routine.

Voila! I hope I’ve convinced you to try a waterless week yourself sometime, it really forces you to be creative, and there are lots of blogs with fun hair ideas that you should experiment with. Enjoy, and stay warm!

Why I Love My Bangs

Aside

My first experience with bangs was in early elementary school. My mother must have thought it would be a nice change, or maybe I did, who knows. All I know is that I remembered throughout the remainder of my childhood and teen years that curly hair + bangs = horror and ridicule squared. They twisted this way and that, making me look like a sad dorky kid from some 70’s sitcom. Not cute.

So when I was in my 27th year and about to take on a new job that would initiate a very positive shift in my career, it surprised me that I wanted to try bangs again. I took out my shears, and in front of my mirror only minutes before my boyfriend was due to pick me up for dinner, I cut some bangs.

Now to preface this, I’d already been trimming and adding some layers to my hair myself, but this was still a really big deal. I cut them while my hair was straight (oops) so they were way too short when they curled up. Still, I was living in hipster haven Williamsburg, Brooklyn at the time, and half-way down your forehead bangs were actually in at the time. Who knows, maybe they still are. I went out and wore them with pride, sneaking glances in the mirror at the restaurant from time to time. It was terrifying, but so exhillerating!

Since then, I’ve had some variation of bangs at all times. Sometimes side swept, sometimes in the middle, sometimes short, sometimes almost covering my eyes. I just have to say I love them so much. They add incredible versatility to my ‘do, especially now that I have such short layers and a shag-like haircut.

Sorry to hate on you, Minnie, I loved you in “Good Will Hunting,” but you really should use a wide-toothed comb on those bang curls to loosen them up.

When I have my hair in the “pile” or “fountain,” or even a plain braid, they add some cool fringe to frame my face. When I want to hide, I can pull them forward, and when I want to see the world a bit more clearly I can put them to the side or clip them back. The top layer of my hair isn’t as ringlet-y as the bottom layers, but I can loosen my curls a bit further by pulling gel through them in a downward motion while I’m styling. Then when they’re dry, I rake my fingers down again to separate the curls a bit and add some nice coverage over my forehead.

Just saying, don’t be afraid… if your curls don’t have more than a 6-inch spring factor on top when dry, it’s worth a try. Cut them long at first, so if they suck you can always pin them back or sweep them to the side before they grow out in a few months. Or have a hairstylist do it for you, and they’ll do it right the first time. Trust me, ladies!

Get Wet!

While lounging poolside over Memorial Day Weekend (important side note: thank you so much to our troops, I truly appreciate everything you’re doing for our country!) I read in In Style that the wet hair look is in right now. This is great news for us curl-meisters, we just have to be sure to do it the right way. When I worked for a large publishing house years ago, I’d attract looks of scorn when I’d run into the elevator amongst the most judgmental of beauty editors and fashionistas with my hair still wet from that morning’s shower.

As we all know, diffusers are often more trouble than they’re worth. Curly hair looks best when it’s left to air dry, and in the summer no one wants to go near a hair dryer if they don’t have central air. I’d eschew their silly rules and go wet anyway, and my hair would be dry and glorious by lunch time. It’s just the price you have to pay for bounteous curls. While I was working there, one of the big-name glossies actually had a blog post about how bad wet hair looks at work.

Well, preposterously fickle beauty world, now it’s ok to rock wet hair. This is thanks to new red-carpet looks that favor severely slicked-back ponys and buns. It’s especially beneficial since you can gloss your ends with your favorite oil treatment or conditioning glaze and no one will be the wiser!

How to do it:

1) Wash and condition as usual in the shower. Leave in a touch more conditioner than you normally would, because no one will know and it’s good for your hair. It will also increase drying time, leaving you wetter longer. Skip the gel at this point.

2) Before stepping out, quickly run your head under the water flow one last time, then squeeze mostly dry (don’t scrunch, you want to elongate strands).

3) With your head upside down over the tub, coat the hair nearest your hair line with gel, on top of and under your head. Just one dollop will do. Don’t worry about your ends since they will not be seen. Instead, coat ends with a few drops of an oil serum.

4) Still upside-down, twist all hair into a bun on top of your head (I prefer this step without elastic, keep reading). Straights can do a low ponytail, but we know we’ll end up with a frizzy mess. Buns are best, even if you choose to do a low bun at the nape of your neck to up the class factor.

5) Don’t fasten your bun with an elastic — instead, anchor the bun to your head in the desired position with as many bobby pins as it takes.

6) There should not be any stray hairs hanging out, if you have bangs or really short layers that are not contained in the bun, be sure to bobby-pin them so that they appear to be part of the bun.

I paired my wet bun with a small scarf (think handkerchief-sized, but more chic) from American Apparel for my commute to work in order to soak up the drippings. By the time I got to work, my hair was dry enough to whisk off my scarf, and voila!